PVC Espas
This is a project I began near the end of March 2000. The photos on this page show the as-yet incomplete instrument as it existed at the end of April 2000.
I saw the Espas in the Blue Man Group show, then talked with one of their musicians after the show. They said the ideas embodied in their instrument were in the public domain because it was published in an early 70's experimental music magazine.
Instruments like this have been built since the 1970's and are currently best known for their use by Blue Man Group (who can be seen live in New York, Boston, Chicago and Las Vegas, and has appeared several times on the Tonight Show with Jay Leno). There is also an article by David Barnes in Experimental Musical Instruments magazine, June 1993. If you don't want to build your own, check the JOIA Ensemble's products, also sold by House of Musical Traditions.
Plans
Several people have asked if I have "plans" for my design so they can build one of their own...
Although I have no plans for my Espas (I just designed it as I went along), it's easy to duplicate without plans and I would recommend most people to make something a little less "elegant". Let the pipes just be straight tubes of different lengths, kind of like a Pan flute. The design I used, shown here, had to meet extra requirements you probably don't need — I wanted to be able to wheel it around on the stage, and roll it up and down the gangway of a boat, and I wanted the exit holes of the pipes to be lined up in two perfect straight rows. Even Blue Man Group didn't have as many constraints.
As for tube lengths and so on, just use the formulas I set out in the section titled "Measurement, Formulas, etc." below. You will need to select your own notes based on what scale you want.
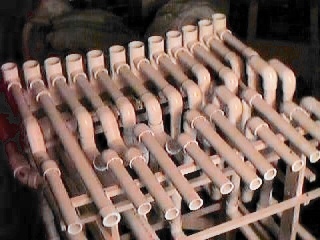
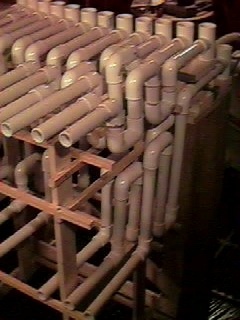
Here are two overall views of the whole construction:
|
|
|
There doesn't seem to be an established name for this specific instrument design ("tube" and "pipe" is too generic). The description "end-struck plosive1 aerophone2" is technically accurate but unappealing, so I've decided to abbreviate it to "ESPA". Since each tube3 is an aerophone in and of itself, I make the word plural to name the whole instrument, thus "Espas".
Espas can be acoustic (unamplified) or electric or both. This instrument was designed to work well both ways, with the idea that it might be used in a performance on stage. Most of the design constraints come from making it work well as an acoustic instrument.
The espas are played by hitting the large ends (called strikeheads) of the tubes (at the top in the pictures above). You can hit it with your hands or pretty nearly any object (drumstick, rubber paddle, mallet, etc.) but it requires amplification to hear the resulting sounds unless you use rubber paddles or something similar. Playing it requires about the same skills one uses in playing a xylophone, marimba, or hammered dulcimer. However, you do not have the option of holding multiple mallets/hammers per hand, because the entire arm's strength must be behind each stroke. As with the xylophone, etc. the skills for playing are quite different from piano, because the control of the arms is more important, and control of the wrists/hands less important, in selecting the note to be played; this involves controlling different muscles and learning a different set of reflexes. (This is why these types of instruments are more accessible to percussion players than to pianists, and why orchestras place them in the percussion section, etc.)
The tubes are all very carefully measured so as to produce one particular note in the scale (a tube may produce multiple notes if it is equipped with one or more valves like those on wind instruments). Bends are added as necessary to ensure that all the tubes will end up pointing in the same direction (out towards the audience) and in two straight rows. This helps ensure that the sound from all tubes will be equally loud from the audience's point of view (provided the tubes are played equally hard by the performer).
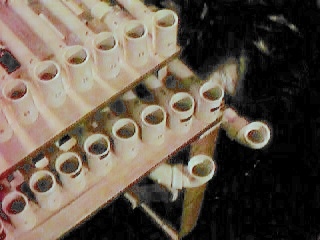
Here's what it looks like from the performer's point of view:
|
|
|
The strikeheads are arranged in three rows (the bottom row not yet complete at the time of these photos). It takes a fair amount of training to learn how to consistently hit the tubes with the same force and proper positioning.
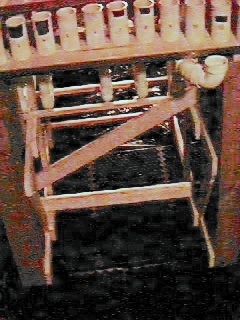
The strikeheads are supported by shelves to absorb the force of impact while allowing the area underneath to be left open. This area is for the performer's legs if the performer wishes to sit down behind the instrument while playing (this is only practical if the instrument is electrified). In the future I also plan to add foot pedals for key changes.
The front of the instrument is arranged into three sections, top middle and bottom:
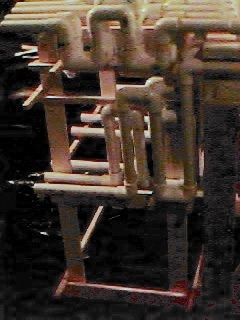
Tubes and empty area on bottom from stage left
The top section contains the tubes from the top row, and the middle section contains the tubes from the middle row. The bottom row tubes (most not yet done when these photos were taken) occupy some of the space in the middle section and some of the space in the (currently empty) bottom section.
The bottom section is also being left open for future enhancement. I plan to add seven pedals to change the instrument's key in a manner similar to the orchestral harp. These pedals will open valves like those on a clarinet to raise the pitch by a half-step or whole step.
The scale is currently fixed to the key of A major or F-sharp minor (three steps in the "sharp" direction from C major). The top row of tubes is arranged in a somewhat unusual manner. From left-to-right as seen by the performer, they are:
D C# E D F# E G# F# A G# B AThe middle row of tubes runs like this:
F# F# G# G# A A B B C# C# D DThe D at the right end of the middle row is the same as the D at the left end of the top row.
This arrangement has several advantages over the more obvious piano-like arrangement (as used on the xylophone):
- All common intervals used in melodies and harmonies are located very close together, making complex sequences easier to play.
- Most chords (including major, minor, sus4, maj7 and min7) can be played by striking two adjacent tubes simultaneously with one paddle and the other tube(s) with the other paddle.
- Having two of each note gives the player lots of choices regarding how to play a desired sequence of notes, making it easy to avoid getting the hands crossed.
- Having two of each note allows steady or continuous notes to be played by rapidly alternating both paddles on two tubes of the same note (this is possible on a xylophone, but wouldn't be possible on espas with only one tube per note)
- When the pedals are added, all scales will be equally easy to play. You don't have to adjust for the uneven spacing of notes when playing in a key like B major. On the other hand, a disadvantage that goes along with this is that one cannot find a note by looking at the 3-2-3-2 pattern, or by feeling for the black keys as a good keyboard player does.
This photo (sort of) shows the staggered pitch arrangement on the top row tubes:
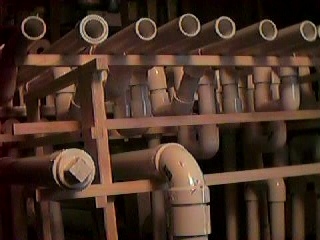
Open ends of 7 treble tubes, and 2 bass tubes
The bass tubes (two shown here) are closed at their ends, unlike all the other tubes. A closed-end tube produces a note one octave lower for the same length, but obviously most of the sound comes out of the open end. When I finish physical construction I will be adding tiny microphones inside each tube; the threaded end-plugs will make this addition easier. The bass row, when complete, will have seven notes, each one octave below the tubes in the row above it:
D C# E D F# E G# F# A G# B A . F# F# G# G# A A B B C# C# D D .<b> F# G# A B C# D E</b>Here are the midrange tubes, also not yet complete in this photo:
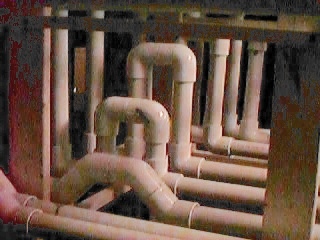
Midrange tubes from stage right
The strikeheads are labeled with note names, to assist players who are unfamilar with the layout:
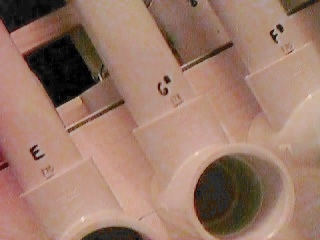
Closeup of three strikeheads
(The small numbers barely visible below the note names are length measurements used during assembly.)
These strikeheads are 1 1/2 inch PVC — larger than the tubes which are 1 1/4 — because I discovered, by experiment, that it produces a louder sound. It seems to allow a greater amount of energy to be transferred from the paddle to the air when the paddle strikes the strikehead. Most of this energy travels down the tube and contributes to the sound, rather than just bouncing off the bottom and escaping back out the top (this is because, during the brief time it takes for the bounce to occur, the paddle is still blocking the top of the strikehead). The bottom end of each strikehead (the end that touches the wooden shelf) is plugged with a PVC end cap; it needs to be airtight so that the air has nowhere to go but down the pipe. Even a tiny crack has an unbelievably high impact on pitch and volume.
These strikeheads are solid (hard plastic), but flexible (rubber or squishy plastic) strikeheads actually work better, mainly because they ensure full contact between the paddle and the strikehead around the entire edge of the strikehead. This produces a more consistently clear and steady sound, and might perhaps reduce the amount of skill and practice required to become a good espas player. Flexible strikeheads can be custom-made with a mold and a caulking gun; I will probably begin experimenting with this soon.
Here is an end view of the two shelves that hold the strikeheads:
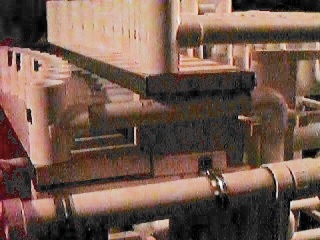
Top and middle rows of strikeheads supported by shelves
Each of the tubes separates from the strikehead to facilitate disassembly for transport. For the middle row, the joint is under the downstage edge of the top shelf, just before the 90-degree turn. The top row tubes separate at the strikehead itself. They can be rearranged into any order to allow for further experimentation with the arrangement of the notes.
The strikehead is the only part of the tube actually attached to the frame — each has a screw going through the bottom end (which is a PVC end cap, as I mentioned above) into the shelf that the strikehead rests on. The rest of the tube just rests on the frame. On one occasion, to facilitate rolling the instrument around on a stage, I tied the open ends of the pipes down with string, but I can move it short distances without even doing that. You tilt it back onto its wheels, roll it and tilt it forwards again — like moving an orchestral harp.
The shelves are hardwood and reinforced with steel. They were designed to support my weight without sagging. The reason I made them so strong is that I thought I might want to hit the tubes with rubber mallets or some other rather heavy object at a fairly high speed. I haven't tried rubber mallets yet, but I've broken a couple paddles and the sound is quite loud even without amplification. I performed in front of an audience of 120 without amplification and based on audience feedback everyone was able to hear the music quite clearly.
The bottom (bass) row is not supported as strongly. This row of pipes was added after I realized I didn't need quite so much strength. The bass tubes are held in place with brackets.
Measurement, Formulas, etc.
To get the right length for each pitch, I used the formula:
length = speed-of-sound / frequency
I use the metric system everywhere. The speed of sound is 343.8 meters per second at 20 degrees C and 40% relative humidity, it goes up a little bit with humidity and a lot with temperature (at 23 degrees C, it's 345.7 meters per second). But using the first figure we get
length = 343.8 meters / frequency
so for an A of 440 hz, the length would be 781 millimeters. Here are the lengths of all the tubes in my design:
. 1170 1239 1042 1170 928 1042 827 928 781 827 695 781 D C# E D F# E G# F# A G# B A . 1856 1856 1654 1654 1561 1561 1391 1391 1239 1239 1170 1170 F# F# G# G# A A B B C# C# D D .<b> 1856 1654 1561 1391 1239 1170 1042 F# G# A B C# D E</b>Pipe End Effect Adjustment
Because of the end effect (a property of all open pipes, including flutes and organs, etc) the effective length of a pipe is longer than its actual length. Each open end counts for about half its diameter in extra length.
Thus, to actually get an exact 440-Hz note, the pipe has to be a little shorter than 781 millimeters. The formula becomes:
for tube with one open end:
length = 343.8/frequency - radius
for tube with two open ends:
length = 343.8/frequency - 2×radius
Using the same A-440 example, and using 1 1/2 inch pipe (with an inside diameter of 40 mm) you would subtract 20 mm for each open end. So, if the pipe is open at each end, the length of the pipe you cut would be 741.
Length of Bends
I also needed to figure out the effective length of the elbows, 45-o corners, strikeheads, and any other special fittings. I measured most of these by building a long pipe that uses lots of the same fitting and measuring the pitch — from this I could calculate the length that this convoluted pipe appeared to have and compare it to the length and pitch of a normal straight pipe. I came up with numbers for each type of fitting (this is for the PVC pipe with 40-mm inside diameter):
strikehead: 71 mm
90o elbow: 86.5 mm
45o elbow: 79 mm
coupling (straight joint): 63 mm
Then I built some more experimental pipes and adjusted these numbers until the numbers, added together with the lengths of straight pipe, correctly predicted the resulting pitch.
For example: to calculate the length for the strikehead and 90o elbow, I built two pipes that both produce a B (which should be 695 mm long). Using an electronic tuner, I found that a strikehead plus a single length of pipe 625 mm long produced exactly the same pitch as a strikehead plus seven (7) 90o elbows plus 19 mm of straight pipe. Let S be the effective length of the strikehead, and E the effective length of the elbow. Therefore, 695 = S + 625 = S + 7×E + 19, giving S=70 and E=86.6. Note that by using the nominal length of 695 mm for a B I was ignoring the end effect in these calculations. Since each pipe has one strikehead, the number for the strikehead ends up including both end effect lengths. Other similar experiments gave slightly different results and I averaged together all results to get more accurate estimates.
If you build your own instrument, you will probably have to repeat this work yourself because the internal dimensions of elbows and other fittings differ from one PVC pipe manufacturer to another.
Final Adjustment
Despite one's best efforts to pre-calculate the proper lengths to get the right pitch, there will still always be some error due to the difficulty of aligning the parts during the gluing process. Therefore, I built each espa a little longer than I needed and cut bits off the end until the pitch was just right. Then, I added a small tuning extension collar to each pipe, like that used on an organ pipe. An extension collar is a small piece of pipe that fits over the end of the main pipe and can slide in and out a little bit, making the pipe shorter or longer. When all the pipes have been built, and when the instrument has been sitting in a constant humidity and temperature environment for a few days, it can be tuned by adjusting each collar until the pipe has the right pitch. I used an electronic tuner, but if you had a good ear and another tuned instrument you could tune it the old fashoned way.
Paddles
Here are the five paddle designs I have used so far. The original photo was so dark you couldn't see the shapes of the paddles, so I gave it a late 1960's makeover:
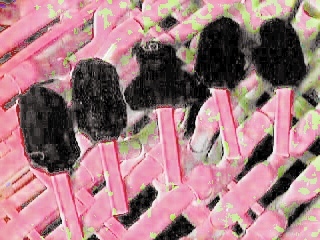
Psychadelic Paddles
Starting from the left, the first two are standard paddles designed to hit just one note. The first is smooth and the second is rough (but you can't really see this); the difference in sound is subtle but the rough paddle produces a softer sound. The third paddle is shaped like the "club" symbol on playing cards. You can play one note or two depending on which part of the paddle you hit with. The last two paddles are left- and right-hand versions of another design that I intended to use for playing two notes at once. None of these designs is entirely satisfactory and I have several more paddle ideas yet to try.
The flexible part of each paddle was cut out of a doormat made from "closed-cell foam rubber" doormat. Closed-cell is very important: this means that the "holes" in the foam rubber are enclosed bubbles. It feels spongy, but unlike a sponge, water cannot enter or pass through it. Open-cell foam wouldn't produce nearly as much sound — when the paddle hits the tube, the air should have no means of escape aside from travelling further down the tube.
The rubber mat was from a large hardware store. Here's how I make a paddle:
- Cut out two pieces of the rubber mat. As you can see in the picture above, I tried different shapes.
- Glue them together (with a stick in the center)
- While the glue is drying, hold the two layers (and the stick) together
with wood and clamps.
Clamp it in such a way that the side you play music with is flat, and the two layers of rubber are held tightly together everyplace except the central section where the stick is. (To do this I used a few pieces of wood of different shapes, like a makeshift mold.)
If all you can find is open-cell foam (the kind they make mattress pads out of) you might be able to seal the surface of the foam by applying a layer of some type of flexible glue-like material, such as rubber cement. However, it'll be tricky to make the surface smooth. Work outdoors in case there are fumes or a chemical reaction!
Electrification
I still haven't electrified my espas, but I have done the tests to determine how to do it and found that it works well. I just haven't bothered to wire it all together permanently.
Buy a bunch of condenser microphones. Follow the application notes for your condenser mic to impedence-balance it properly. Place the condenser mics inside each tube, and run shielded cables from the mics to a convenient spot where the inputs can be combined together. Wire them in parallel (this means connect them all to the same input — it is common to wire multiple microphones in parallel and this is an easy way to combine their sound, as long as you don't need to adjust the gain of each mic separately). Connect to a microphone preamp or other appropriate equipment.
Adjust the position of each microphone to be an equal fraction from the end of its tube, as compared to the length of the tube. For example, if you place one of them 1/10 of the way in, put them all 1/10 of the way in.
For live performance with an amp, the espas will be more susceptible to feedback if you have the mics far inside the tube, and less susceptible if the mics are near the end of the tube. However, putting the mics further in gives a longer, deeper note. Experiment wth the microphone placement, adjusting each one individually.
1 plosive: In phonetics and linguistics, describes the sound of phonemes produced by a sudden, explosive release of pressure. Examples in English are the letters p, b, k, g, t, and d. This instrument is plosive because its sound has a sudden loud start and fades quickly.
2 aerophone: One of five major divisions of musical intruments, includes all instruments that derive most of their sound from the resonant vibration of air (usually confined in a long cylindrical shape). This includes reeded instruments (e.g. clarinet and trumpet4) and unreeded instruments (e.g. flute and espa).
3 tube: I call them "tubes" rather than "pipes" because "pipe" is more commonly used to refer to something with holes and/or reeds, like a whistle, flute or organ pipe. On the other hand, Merriam-Webster's Collegiate Dictionary gives one definition for "tube" as "The basically cylindrical section between the mouthpiece and bell that is the fundamental part of a wind instrument."
4 trumpet: The trumpet player's lips act as a reed.
This site is not endorsed by, sponsored by, or affiliated with the Blue Man Group, the JOIA Ensemble, House of Musical Traditions, the National Broadcasting Company, NBC Studios, the Tonight Show with Jay Leno, britannica.com, or Merriam-Webster.
This page was written in the "embarrassingly readable" markup language RHTF, and was last updated on 2023 May 30.
 s.27
s.27