iBook and PowerBook Clamshell Sleep Control
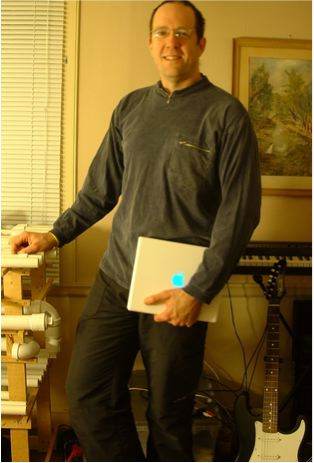
In this photo I am holding an iBook that has a blue Apple logo and stays on when closed. The blue Apple logo was accomplished pretty much the same way Mike Margolis did his Clarus iBook (formerly here). Owners of more recent models like the MacBook Pro can find instructions here on iColours.ca.
How to make it stay on when closed is the subject of this page.
The Problem
Many users of Apple portable computers want to either: A) leave their computer running with the screen closed, without any need to see what is on the screen, B) get their computer to turn off its internal display while leaving the external display active (through video mirroring) but without closing the lid (applies to Powerbooks only), or C) temporarily disconnect and reconnect the external display while the lid is closed, without the computer going to sleep (applies to Powerbooks only).
Those who want A and/or C need to prevent their portable's lid-closed sensor from triggering; those who want B need to cause the lid-closed sensor to trigger.
How it Normally Works
As shipped, recent-model Apple iBook and PowerBook portable computers are set to go to sleep when you close the lid (folding the screen down until the latch closes). On a Powerbook, if the external display is active (something plugged into the video connector) the computer does not sleep but turns off the internal display (this is called "clamshell mode") but does go to sleep in the event that display is disconnected.
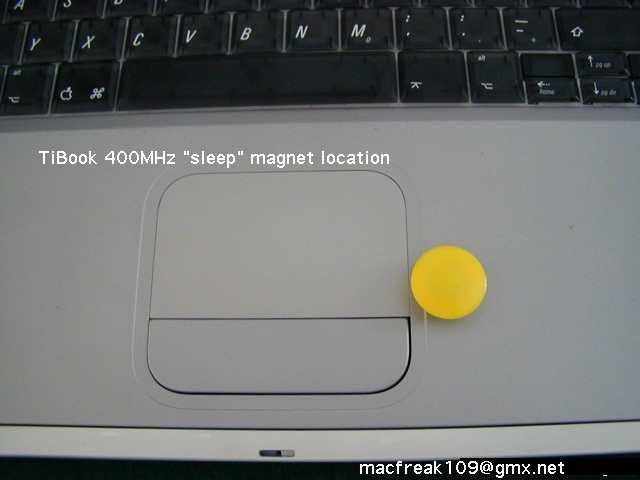
When the lid is closed, a magnet comes into proximity with a reed switch (sometimes called a "Hall effect sensor"). The location of the magnet and reed switch varies by model — in some models the magnet is in the bottom part of the computer and the reed switch in the top, and in other models it's the other way around.
| Model | Location of magnet | Location of sensor |
|
"clamshell" iBook G3 300/366/466
(Tangerine, Blueberry) | top half, 3.4 inches from left
1.3 inches from top | bottom half
battery charger board7 |
|
White iBook G3
(transparent case) | unknown | unknown |
|
White iBook G3
(opaque case) | just below ▶ key | right edge of screen |
|
iBook G4 (at least some models) | just below ▶ key | right edge of screen |
|
Original Titanium 15"
PowerBook G4 (400/500) | behind screen, right of top-center | to right of trackpad 4 |
|
550/667 and DVI Titanium
PowerBooks | behind screen, left of top-center | upper-left of trackpad 1 2 3 |
|
Aluminum 15"
PowerBook G4 (1 GHz) | behind screen, top-center | middle of trackpad 5 |
|
Aluminum 17"
Powerbook G4 | behind screen, a bit above and to the right of center | under trackpad, top-right quadrant 8 |
|
12-inch
PowerBook G4 | right edge of screen | right edge of case,
just below ▶ key |
| MacBook 13" 6 | left edge of screen, about 40% of the way down | left edge of case, just below fn key, between audio connectors and security connector |
| MacBook Pro 15" | right edge of screen, about 40% of the way down | right edge of case, to the lower-right of ▶ key, near bottom-right corner of speaker grille |
| MacBook Pro 17" (Core 2 Duo through "Thunderbolt" Core i7) | right edge of screen, about 40% of the way down | right edge of case, to the lower-right of ▶ key, 1 inch below bottom-right corner of speaker grille |
| other models | contact me by email | mrob27 at gmail dot com |
When the reed switch is activated by the magnet, the PMU (power management unit) sends a message to the operating system. The OS takes action usually by telling the PMU to put the system to sleep. The PMU can also take action on its own. The precise details and how the actions are carried out depends on the iBook model and OS version.
WARNING!
All portable computers are designed to run with the lid open. Most are not designed to run with the lid closed. If you run your portable computer with the lid closed, you risk damage from overheating. Most portables depend on the keyboard as a place to let out heat (the CPU and memory are usually right below part of the keyboard). In particular, do not leave your portable computer running while it is inside a carrying case, or anywhere else that blocks the ventilation slots. Brief periods of operation while closed, such as a couple minutes to move from one room to another, should be okay. USE COMMON SENSE! (Note that according to Apple — see here — it appears to be okay to run the MacBook Pro and Powerbook models with the lid closed provided that the display and backlight are both powered down. But if you disable the sensor as described below, the display will not turn off although you can manually turn off the backlighting.)
Sleep Prevention Solutions
For a while there was a software utility called "Insomnia" (search for Insomnia.kext) that could prevent the OS from putting the computer to sleep. However, it only works in certain versions of the OS and it requires installing. It works in MacOS 10.3 "Panther" but sometimes stops working and has to be disabled and re-enabled to work again. (I haven't bothered to work out the precise details; I also don't know if it works in Tiger or Leopard).
However, even when an OS-directed solution works, the iBook can still go to sleep under the direction of the PMU. This action is much more difficult to prevent.
What people really want is a way to selectively disable the reed switch. It should be quick and simple, reversible, and not void the warranty or cause any permanent modification of the computer. Clearly, any electrical modification, such as placing a switch in series with the reed switch would be difficult, void the warranty, and probably rather ugly.
My Solution
My solution is to divert the magnetic field lines of the magnet, preventing them from activating the sensor. This is performed quite easily and effectively by placing a thin piece of iron or iron alloy (or anything with sufficient ferromagnetic properties; paramagnetism is not enough) over the magnet. (One reader reports that they got an "aluminum sheet" folded until it was about 2-3 mm thick to work on a Powerbook G4. I have not gotten aluminum to work (and I went up to 5mm), but different Mac models have different types of magnets and sensors.)
Whatever you use must be thin enough to fit between the two halves of the computer when the lid is closed (otherwise, what's the point? :-) Preferably it should stay in place when in use (typically, the magnet itself will hold the metal in place fairly well).
The location of the magnet, and necessary size, shape, and/or thickness of the piece of metal, vary from one brand of Apple portable to another.
On an iBook G4 I found that two layers of material cut from tin-can lid, in a 2cm×2cm square, were enough. Thicker is better for this application, so just to be safe I used three layers. Later I found that three layers also works reliably on a MacBook Pro (an early Core 2 Duo model).
This is still thin enough to fit easily when the lid is closed, with plenty of room left over. I wrap tape around the whole thing to keep the three layers together and to protect the computer from being scratched by the edges of the metal.
However, some newer models (such as a 2011 MacBook Pro) seem to have a much more sensitive sensor, and require so many layers of metal that closing the lid is no longer possible (although it can be almost closed).
You might want to improvise, trying different bits of metal you have available. It doesn't necessarily have to be solid or flat.
Sleep Triggering Solutions
For those tho wish to make their portable think it's closed, even when it isn't, the solution is to place a magnet somewhere near the sensor. See the chart above to see where this is. For Titanium Powerbook owners, the solution involves resting the magnet near the trackpad 2 4.
Other Models
If you have a different model than the ones described here, you're on your own for now (but I'd like to hear from you if you can contribute information)
The most important step is to locate the magnet and sensor on your model.
Use a paper clip dangled from a piece of thread to locate all the magnets in your computer. Hold the thread so the paper clip is close to, but not touching, the bottom (keyboard) half of the computer, and move it slowly back and forth in a sweeping pattern covering the entire surface. Then repeat this activity for the upper half of the computer. Note that the magnet might be in an unexpected places, such as the middle of the screen, as it is on the 15-inch Titanium Powerbooks.
Take note of the positions of all magnets you find, then rule out any that have known functions: the speakers, the fan(s), the latch mechanism (if any). Also note that the lid-closed magnet and sensor, by necessity, cannot be located really close to the hinge (top edge of keyboard and bottom edge of screen).
See Also
I have an article on MacBook Pro that is mainly concerned with hard drive upgreades.
I have an article on the Magic Mouse that tells how to fix its maddening "spastic scrolling" behaviour in certain applications, like inDesign, Adobe Illustrator/Elements, and Google Maps in a broswer.
Footnotes
1 : http://www.applefritter.com/node/view/3861 "IIRC the 550/667 model has the magnet in the same place as your DVI Book. Its easy to test for the sleep-switch location, just hover a small magnet over/around the trackpad area until an awake Book sleeps."
2 : http://mojo.us/~jpk/PBmagnet.jpg
3 : http://thinkplaydesign.com/news/ihome/ "I purchased the PowerBook/550 on eBay [...] With the lid/screen assembly removed from the lower half, and its internal cables disconnected, I located the round, 1/8" magnet inside the lid behind the LCD screen. The magent[sic] triggers the sleep switch located beneath the PowerBook's trackpad."
4 : Marc Teusch, personal correspondence. He sent me this photo. This location was corroborated by Eric Williams.
5 : Robert Hiller, personal correspondence. He reports that "Using the lid of a soup can right over the trackpad prevents it from sensing the lid closure."
6 : Reports by email from Toby Wahlers and Scott Penrose.
7 : Clamshell iBook info from Ethan Goldberg. The battery charger board is near the battery. The sensor and magnet don't line up but the sensor has a fairly wide range.
8 : Bob LLoyd, personal correspondence.
This page was written in the "embarrassingly readable" markup language RHTF, and was last updated on 2015 Sep 19.
 s.27
s.27